Integrating your Joomla website and a CDN (like StackPath or Amazon CloudFront) with this plugin is incredibly easy!
In this tutorial you will learn how to make your Joomla setup use a Content Delivery Network (CDN).
This tutorial assumes you already have an account with your CDN of choice.
Create a CDN Pull Zone
First we will create a CDN Pull Zone.
Log into your account at your CDN of choice, and follow their respective instructions to create a Pull Zone.
Here is a CDN-specific tutorial we put together: How to use Amazon CloudFront in Joomla!
The CDN service will now generate a domain for you to use. For example, that will look something like:
foo.bar.netdna-cdn.com
You can now manage and use your pull zone.
Set up CDN for Joomla!
Great, so your CDN Pull Zone is all set up.
Now we'll set up CDN for Joomla! so all the media urls in your Joomla site will be converted so that they point to your CDN server.
Step 1
Install CDN for Joomla!
Step 2
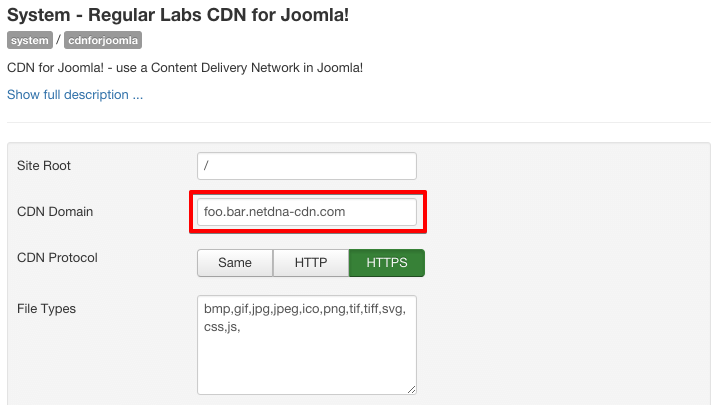
Go to the "CDN for Joomla!" system plugin:
In your Joomla administator go to Extensions >> Plugins. The search for System - Regular Labs CDN for Joomla! and click on it.
Step 3
Leave the Site Root option as it is.
Place your CDN URL (e.g. foo.bar.netdna-cdn.com) into CDN Domain, then click Save & Close.
Done!
And that's all! You are now officially using your CDN service on your Joomla site.
Check implementation
To ensure you implemented your CDN correctly, you can view the source code of any page to confirm that the CDN domain is being used for static assets instead of your origin domain.
You can also use tools like pingdom, gtmetrix, webpagetest that can give you more detailed reports on your CDN implementation status.